Controlling a KUKA robot arm with Ubuntu, Catkin, ROS, RViz, Move-It and Python
Automatically programmed robot arms are used pervasively in industry especially the automotive and assembly sectors and The Midea Group through its KUKA range of products is a leading German robotic equipment manufacturer with a wide range of products in the world. Other leading manufacturers include ABB, Yaskawa, Fanuc, Kawasaki, Staubli, Mitsubishi, and Omron. These companies, of course, have their own programming API to control the robot devices that they have built, but an open source initiative through the Robotic Operating System (or ROS) allows programmers, professionals and enthusiasts alike, to connect to many of these robotic devices from the leading companies, and to programmatically control them.
ROS is an open source collection of tools that comes in several distros such as Indigo, Kinetic, Melodic Morenia (the latest being Noetic Ninjemys). The most important part of ROS is the roscore module containing the core components for publishing and subscribing to ROS messages. ROS allow programmers to write almost complete programs to control nearly all parts of a robot such as light and motion sensors for sight, robotic arms and legs, movements and coordinate location tracking, speech and voice recognition among others.
Now with ROS 2.0 (latest version to-date is Foxy Fitzroy), many features have been improved upon. ROS was originally built primarily to support the LINUX systems (such as Ubuntu) but ROS has already been on the Windows platform for some time now. In this article, I will show you how to control a KUKA KR-210 robot arm through screen simulation (to control the actual physical arm, you would have to upload the same code into the robot arm KR-4 controller through Ethernet protocols and TCP/IP for example).
The first step is to install Ubuntu which is one of the operating platforms ROS is able to run on well. As compared to Ubuntu and other LINUX distros, running ROS on Windows hasn’t really been tested out thoroughly and so I decided to go with Ubuntu. For my Windows 10 laptop, I first install an Oracle Blackbox to be able to run Ubuntu in a virtual environment (VM). Despite Melodic Morenia being the latest ROS distro, it is best to use the most stable version which can run with my chosen OS, which in my case is ROS Indigo. For Indigo, I use the Ubuntu 14.0.4 LTS.
You need to enable Ubuntu to accept the ROS package to be installed on your computer, setup your keys and update your packages list. This tutorial will help you how to install ROS. I would recommend you install the ROS Desktop-Full install version as it will install all the components and packages and allow you to play with the various components such as RViz, etc. You can also install Gazebo which is a real world simulator which you can run your simulated robot device within.
Once you have ROS installed, start the ROS core services by typing the “roscore” command in Terminal, making sure the ros server is running on your machine as in the screenshot below.

Next, check that you also have RViz installed. It should have been installed when you installed the ROS Desktop-Full install earlier. RViz is a 3D visualization tool for ROS that enables robot simulation on your computer. Now head on to the Move-It site which is a motion planning framework that allows you to setup motion paths for your robot. Install Move-It on your machine. Note that Move-It supports many of the popular, universal robotic models from the leading manufacturers (see here for a full list of supported robots) and for this tutorial, you want to install Move-It support for the KUKA KR-210 robot arm. You can find the required Move-It KUKA KR-210 package here.
Note that ROS comes in two programming languages — you can choose to program in C++ or Python. For this article, we will use the Python language. ROS and its dependency packages are built using the catkin MAKE tool. You can find some catkin tutorials here.
Once you have created the catkins workspace, you can install the KUKA KR-210 Move-It package into an active source folder. Below, I use catkin_ws as my base catkin folder:
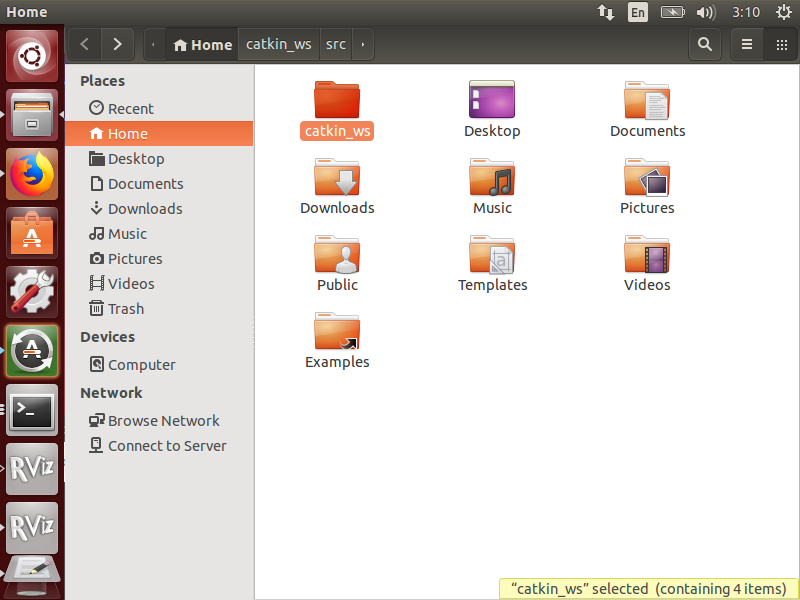
Under the src folder of catkin_ws, create a folder to hold your KUKA KR-210 package from Move-It:
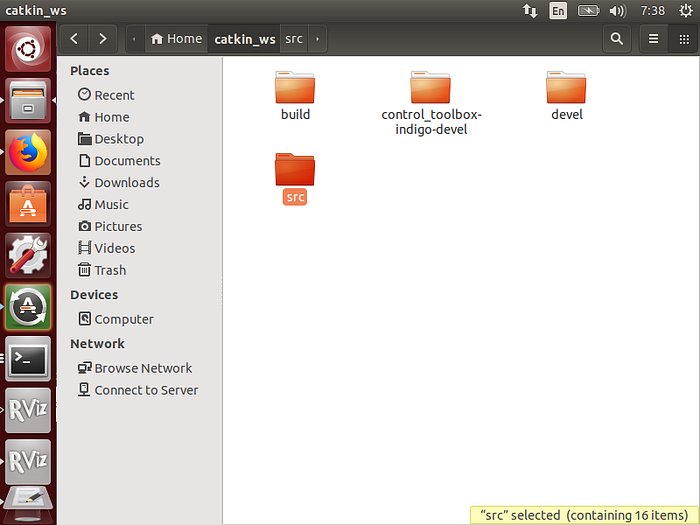
The src folder is also the place where you install all necessary dependency packages needed to run KUKA KR-210 and you’ll find that you need to download and perform a catkin MAKE command on a number of these dependencies in order to make build them into a single launchable application under ROS which you launch with the roslaunch command.

As you continually build your KUKA KR-210 package with catkin MAKE, you will add additional dependencies which are needed by the KR-210 and which the make process will highlight as you go through the catkin MAKE process.
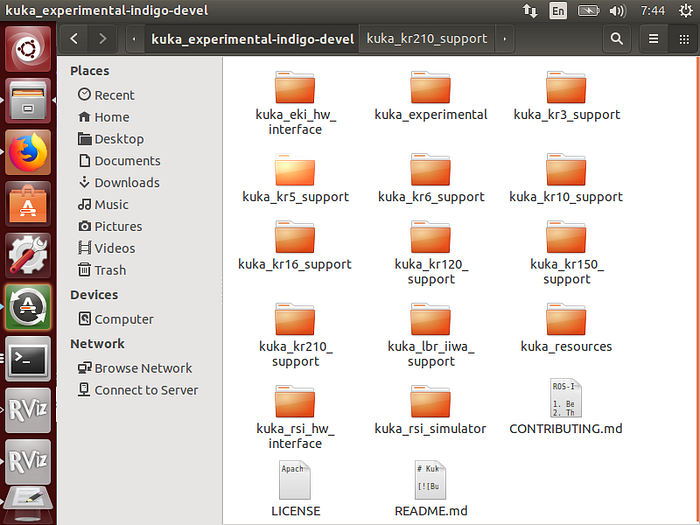
The kuka_kr_210_support folder is the folder required for our KR-210 model so make sure you have installed it from the Move-It site (see above). Have a look at the makeup of the kuka_kr_210_support folder which allows RViz to import this robot configuration into its visualizer.

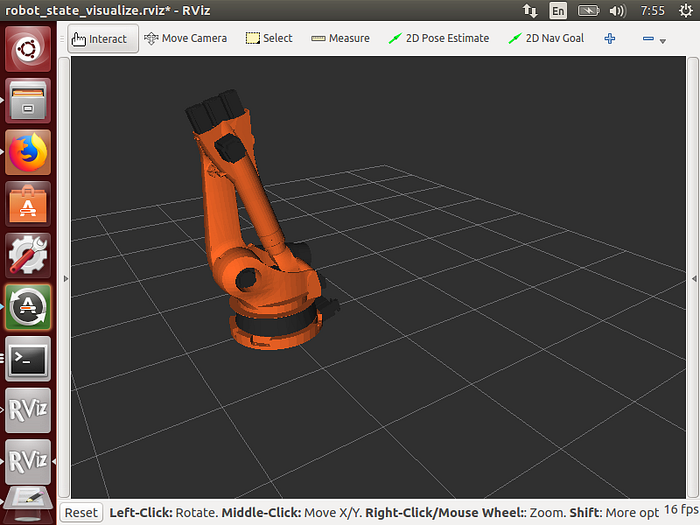
You can launch the test folder to ensure that RViz can visualize the robot using the “roslaunch” command.
In order to move the robot arm programatically, such as making it move in a series of sequential movements, you will need to write a rospy ROS/Python program (or roscpp if you prefer to program with C++) and execute it. Below is a simple Python program (ezani.py), I have written for the KR-210 robotic arm:
— -START OF PROGRAM — -
#!/usr/bin/env python
#rospy is needed to program ROS with Python
import rospy
from sensor_msgs.msg import JointState
from std_msgs.msg import Header
def talker():
pub = rospy.Publisher(‘joint_states’, JointState, queue_size=10)
rospy.init_node(‘joint_state_publisher’)
rate = rospy.Rate(50) # 50hz is normally used
hello_str = JointState()
hello_str.header = Header()
#FIRST MOVEMENT
#give the six robot arm joints their names
hello_str.header.stamp = rospy.Time.now()
hello_str.name = [‘joint_a1’, ‘joint_a2’, ‘joint_a3’, ‘joint_a4’,
‘joint_a5’, ‘joint_a6’]
hello_str.position = [0.00, 0.00, -4.40, 0.00, 0.00, 0.00]
hello_str.velocity = [0.00, 0.00, 0.00, 0.00, 0.00, 0.00]
hello_str.effort = [0.00, 0.00, 0.00, 0.00, 0.00, 0.00]
pub.publish(hello_str)
rate.sleep()
rospy.sleep(5)
#SECOND MOVEMENT
hello_str.header.stamp = rospy.Time.now()
hello_str.name = [‘joint_a1’, ‘joint_a2’, ‘joint_a3’, ‘joint_a4’,
‘joint_a5’, ‘joint_a6’]
hello_str.position = [0.00, 0.50, -2.00, 0.00, 0.00, 0.00]
hello_str.velocity = [0.0001, 0.0001, 0.0001, 0.00, 0.00, 0.00]
hello_str.effort = [0.0001, 0.0001, 0.00, 0.00, 0.00, 0.00]
pub.publish(hello_str)
rate.sleep()
rospy.sleep(5)
#THIRD MOVEMENT
hello_str.header.stamp = rospy.Time.now()
hello_str.name = [‘joint_a1’, ‘joint_a2’, ‘joint_a3’, ‘joint_a4’,
‘joint_a5’, ‘joint_a6’]
hello_str.position = [0.00, -1.00, -1.40, 0.00, 0.00, 0.00]
hello_str.velocity = [0.0001, 0.0001, 0.0001, 0.00, 0.00, 0.00]
hello_str.effort = [0.0001, 0.0001, 0.0001, 0.00, 0.00, 0.00]
pub.publish(hello_str)
rate.sleep()
rospy.sleep(5)
#FINAL MOVEMENT
hello_str.header.stamp = rospy.Time.now()
hello_str.name = [‘joint_a1’, ‘joint_a2’, ‘joint_a3’, ‘joint_a4’,
‘joint_a5’, ‘joint_a6’]
hello_str.position = [0.00, 0.00, -4.40, 0.00, 0.00, 0.00]
hello_str.velocity = [0.00, 0.0001, 0.0001, 0.00, 0.00, 0.00]
hello_str.effort = [0.00, 0.0001, 0.0001, 0.00, 0.00, 0.00]
pub.publish(hello_str)
if __name__ == ‘__main__’:
try:
talker()
except rospy.ROSInterruptException:
pass
— -END OF PROGRAM — -
Note that, from the Python program above, ROS uses the “sensor messages” package (sensor_msgs.msg) and imports the JointState dependency to send messages to the correct joint of the KUKA KR-210 robot arm. The JointState manages the lateral movements for the x-, y- and z-axes as well as the rotational movements for each of the three axis mentioned, making up a total of six parameters. The Rospy.rate is set at 50Hz which is the normal signalling rate for signals to the robot. We put the rospy.sleep(5) command for 5 seconds to allow adequate time lags for the robot to receive and process the signal in between commands. The name property defines all the joint names for the joints on the robot arm which has 6 joints in total. The position property defines the ending positions we want each joint to be at (from the previous positions) which will cause the arms to move. Note that a negative value here will mean reverse movement. The velocity and effort properties defines how fast the movements of the joints will be and the effort put into the movement.
Finally, run the Python program from Terminal and check in the RViz visualizer, that the robot does indeed move correctly according to the parameters set from the Python program. From here, one can program the desired series of preset movements to completion, and then the simulation program can be copied to the KR-4 controller of a real KR-210 robot arm to test out real world physical movements.
P.S. : (Note on my earlier articles — For a rundown on fullstack Java and REST backend development and React frontend development, please check out : Creating a fullstack React/Material-UI DataGrid frontend data grid connected to a Java SpringBoot REST GET API backend with axios.
This article is further extended with my other article, Creating a fullstack Java app with AJAX HTML frontend using jsGrid datagrid and Apex Charts chart component calculating monthly averages from uploaded Excel data files on a Spring Boot REST backend running Apache Tomcat.
For a Python-Django REST API stack implementing HTTP GET, check out my other article, Creating a Python Django REST Service backend with Postgres database.
For a node.js-ExpressJS-MongoDB (through mongoose) stack REST API backend with CRUD functionality accessed via a React-Data-Grid and Material-UI/DataGrid, please check out my article, Creating a CRUD node.js REST service backend with node.js, Express and MongoDB (mongoose) and a React-Data-Grid / Material-UI DataGrid frontend to access the service.
The above article is further extended with Deploying a Node.js server-side backend CRUD REST service to Heroku connected to a cloud-based MongoDB Atlas database which shows how to deploy the node.js app created to Heroku cloud hosting and also to use the cloud-based MongoDB Atlas for public deployment.
An Android/Google Location API article, Creating a Realtime Handphones Locations Tracker For Android Devices with Google Location API and Google Maps).
